Managing Plan Documents
How to add plan documents to benefit plans.
OVERVIEW
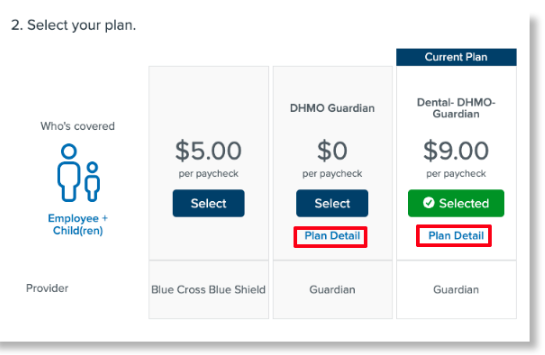
Once a plan has been created and rates have been assigned, you can add any plan documents you want to share with your employees. These documents will be available for comparison in the Enrollment Wizard, and for their perusal when they click View Benefits from the Namely homepage.

Namely adds your plan documents during implementation, but you can update them if you need to.
UPLOADING PLAN DOCUMENTS
-
In Namely Payroll, go to Enrollment Setup > Configuration > Plan Documents.
-
Click Add.

-
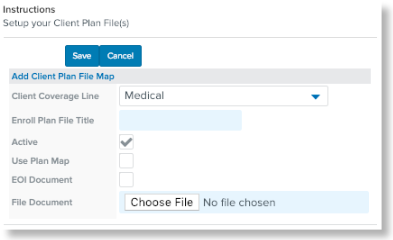
Select the Client Coverage Line.
-
Enter the Enroll Plan File Title. This will be the name of your file in the system.
-
Make sure the Active checkbox is selected.
-
Select Use Plan Map.
-
Click Choose File to upload the document.
-
Click Save.
TIP:
If you're uploading an Evidence of Insurability form, check the EOI Document box. The form will only be visible to an employee if they select a level of coverage above the Guaranteed Issue.
MAPPING PLAN DOCUMENTS
Once you've added your document, you'll want to map it to the correct plans.
-
From the Plan Documents page, Click Map next to the plan document.

-
Click Add Plan File Map.
.

-
Select the Client Plan the document is connected to.
-
Click Save.
TIPS
-
You can add multiple mappings to a document if you'd like the document to appear for more than one plan.
-
You can unmap a plan from a document by clicking Delete from the Plan mapping page.
REMOVING PLAN DOCUMENTS
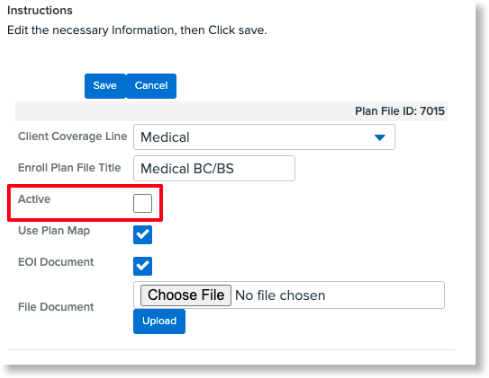
Plan Documents cannot be deleted - but they can be made inactive.
-
From the Plan Documents page, click Edit next to the desired document.
-
Uncheck the Active box.

-
Click Save.